
If you’re planning to install a new air conditioner, this Blue Star AC Installation Guide will walk you through the process step by step. Whether you’re a DIY enthusiast or want to ensure your technician follows the right procedures, this guide covers everything you need to know about installing your Blue Star AC properly.
Why Proper Installation Matters
Proper installation of an air conditioner is not just smacking a box into a wall. It’s precision science, safety, and efficiency for the lifetime of the unit.
Impact on Cooling Performance
A poorly installed air conditioner can cool unevenly or take its time to cool the air. Correct fit and alignment optimize airflow and peak cooling.
Impact on Energy Use
Incorrect installation may lead your Blue Star AC to perform extra work than it requires — and thereby increase your electricity bills. Proper installation makes it energy-efficient.
Warranty and Safety Issues
Did you know that improper installation can void your warranty? Blue Star warranty is only valid in case of installation according to their standard procedure.
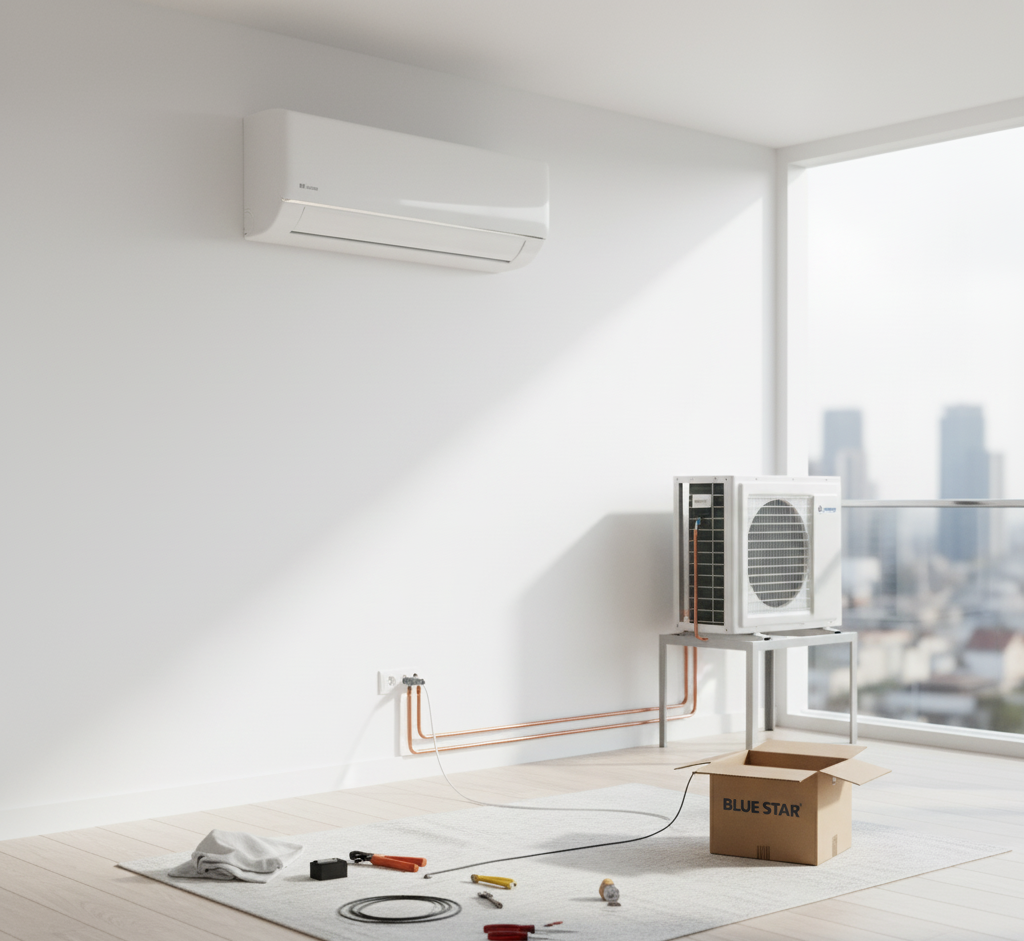
Pre-Installation Preparations
Before you even get to open your brand new Blue Star AC, there are certain things which need to be taken care of. And do them right and your air conditioner will hum along, last for years, and not pester you with any surprise issues later. Do this step as laying the foundation — the stronger the foundation, the smoother your cool-down process will be.
Choosing the Right Place
Placement is everything when it comes to the performance of AC. Inadequate placement will result in your AC performing below par, wasting energy, or even producing annoying noise. to ensure the right location check out this article Where to Install Your Split AC for Optimal Cooling
The following are things to consider:
Airflow and Coverage
Install the indoor unit in such a way to allow free flow of cold air across the room. Do not fix it on corners, niches, or at front furniture. Install it ideally in the centre of the longest wall to distribute even cooling.
Height from the Floor:
For split ACs, place the indoor unit 7–8 feet from the floor level. This will ensure more efficient distribution of air without striking human beings with the cooled air directly.
Avoid placement near Sources of Heat:
Avoid placing the indoor unit in the direct path of sunlight, stoves, kitchen, or electric heat-producing appliances. They will mislead the AC’s temperature sensors and reduce efficiency.
Accessibility
Ensure adequate clearance space around the unit for cleaning and servicing. The service technicians must be able to easily take out the filters and reach the panel.
Outdoor Unit Location (Preview):
Locate the outdoor unit, placing the connection distance as minimal as possible — under 15 meters if possible for optimal performance.
Your Blue Star AC is an electrically starved conditioner that needs proper electrical installation to run in safe mode. Poor wiring or overloading your existing circuit can lead to power tripping or system damage.
The following should be checked before installation:
Dedicated Power Supply
Your AC should be provided with a separate dedicated line of electricity away from other heavy appliances like washing machines and microwave ovens. This will prevent voltage drops during operation.
Correct Voltage & Amperage:
Blue Star split ACs run mostly on 230V, 50Hz single-phase power supply. Check the rating on your AC or user guide for precise details.
Good Earthing:
Safety requirements. Provide your socket with a three-pin grounded plug to make the unit safe from electrical shock or surge.
Circuit Breaker (MCB):
Install an MCB or ELCB of suitable rating (typically 16–20 amps) to cut the power supply in fluctuation or fault conditions.
Stabilizer (If Needed):
Where there’s a lot of voltage fluctuations, an AC tonnage stabilizer (viz., 1.5-ton or 2-ton) is strongly recommended. Blue Star even markets ones which are specifically made to be compatible with this.
Tools and Equipment You Will Need
Have all tools ready before you start the installation. That saves time and you work quickly.
Here is the complete list of tools and materials used in Blue Star AC installation on a regular basis:
| Tool / Material | Purpose |
| Drill Machine with Bits | For mounting brackets and creating wall holes for piping |
| Mounting Plate and Screws | Used to hold and secure the indoor unit |
| Level Meter (Spirit Level) | Ensures the indoor unit is mounted perfectly horizontal to prevent water leakage |
| Vacuum Pump | Removes air and moisture from the copper lines before refrigerant release |
| Manifold Gauge Set | Used to check pressure and perform vacuuming |
| Measuring Tape | Helps measure mounting height and pipe length accurately |
| Pipe Cutter and Flaring Tool | For cutting and shaping copper pipes for leak-free connections |
| Insulation Tape / Sleeve | Wraps around copper pipes to prevent heat loss and condensation |
| Copper Piping (Refrigerant Line) | Connects the indoor and outdoor units to circulate refrigerant |
| Drain Hose | Removes condensation water from the indoor unit |
| Wall Sleeve / Hole Cover | Protects the piping hole and improves aesthetics |
| Safety Gear (Gloves, Goggles) | Essential for safe and professional installation |
Tip: Install Blue Star-recommended installation kits to ensure optimal performance. Low-quality copper or insulation will lead to gas leakage or inefficiency in the long run.
Quick Pre-Installation Checklist
Just quickly go through this before mounting indoor or outdoor unit
✅ Power supply stable and ready
✅ Earthing correctly checked
✅ Appropriate wall reserved for indoor unit
✅ Outdoor space planned and installed
✅ Everything in its place
It’s all worth the trouble to have all of this ready, so your Blue Star AC installation goes off swimmingly, purring happily away, efficiently, and safely setting the stage for years of comfort cool.
1. Selecting the Right Location
Choosing the Optimal Spot for the Indoor Unit
- Avoid Direct Sunlight and Heat Sources: Place the indoor unit away from direct sunlight, heaters, or other heat sources to ensure efficient cooling.
- Ensure Unobstructed Airflow: The unit should have clear space around it for proper air circulation. Avoid placing it behind furniture or curtains.
Positioning the Outdoor Unit
- Stable and Ventilated Area: Install the outdoor unit on a flat, stable surface with good ventilation to help with heat dissipation.
- Distance from Indoor Unit: Keep the distance between indoor and outdoor units as short as possible to maintain cooling efficiency and reduce energy consumption. check out our Article “Best Blue Star AC Maintenance Tips in 2025“
2. Mounting the Indoor Unit
Indoor Unit Installation Procedure
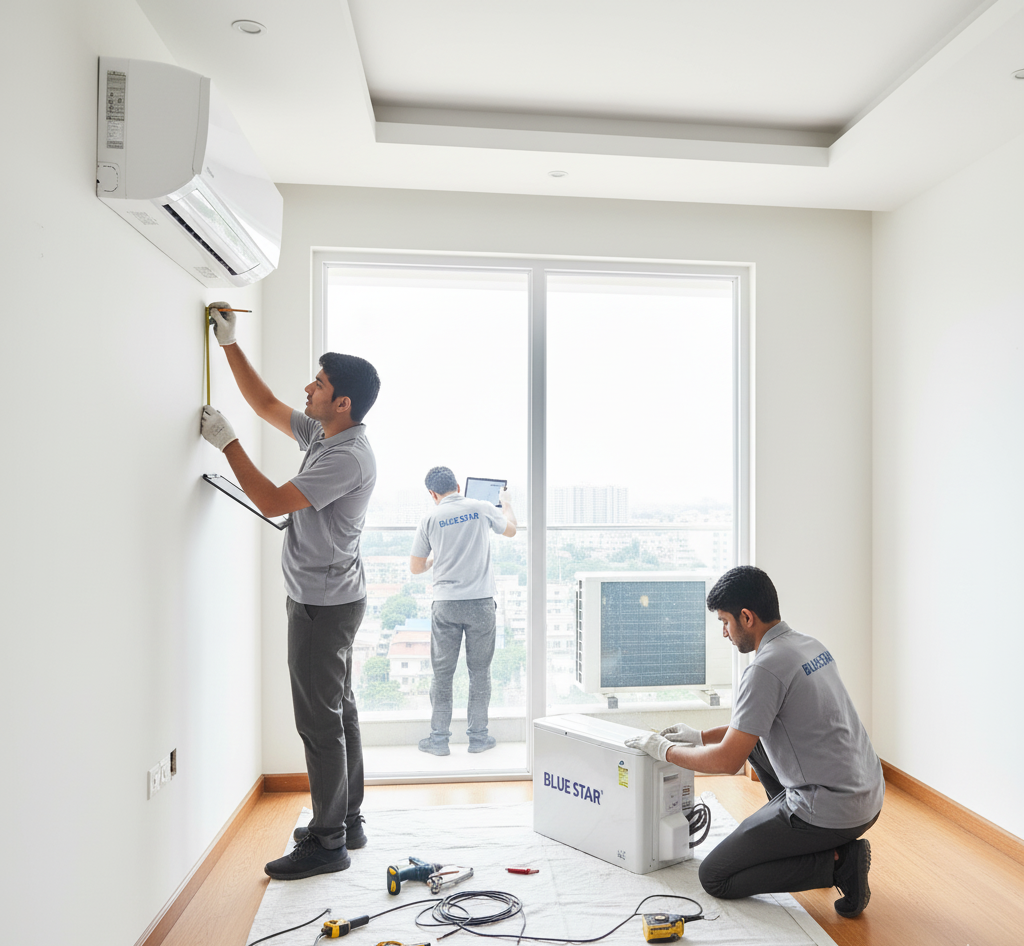
Accuracy time now. Plugging your Blue Star AC indoor unit is not as straightforward as merely plugging it in — it’s more a matter of achieving the exact positioning, proper drainage, and proper wiring so it will function flawlessly. Let us go through step by step.
Step 1: Mounting the Indoor Unit
First off, naturally, is mounting the mounting plate — the plate will hold the entire indoor unit, so it needs to be sturdy and level.
Here’s the way to do it:
Choose a strong wall:
Choose a wall that has sufficient strength to bear the weight of the indoor unit without cracking or vibrating. Avoid thin partition walls and damp areas.
Mount the mounting plate on the wall at the required height (about 7–8 feet above the floor). Mark the spots where it is to be screwed precisely with the aid of a pencil and a tape measure.
Corresponding alignment:
Place a level meter (spirit level) on the plate to ensure it is absolutely level. Slope would lead to water seepage through the drain pipe in the future.
Drill and fix
Drill and install plastic anchors. Then, hang the plate with heavy-duty screws on the wall.
Secure tightly without over-tightening to warp the plate.
Pro Tip: Make sure to allow at least 6 inches of space above the indoor unit and 12 inches to either side for access and air flow.
Step 2: Drilling the Hole for Piping
This one connects outdoor to indoor — it’s got condensate, refrigerant, and wires. Precision here will deliver great performance and cleaner appearance.
Step-by-step:
Where it will make its impression:
Find the shortest distance between the indoor unit and the outdoor unit. The hole should be closest to the right or left corner (depending on your model’s piping direction) as possible.
Drill at an angle:
Drill the wall at a slight angle (5–10°) outside with a 3-inch (75 mm) hole saw. The angle allows for smooth flow of condensation water. To understand how poor piping causes gas loss, check out this article on Blue Star AC Gas Refill Cost in India – Best Guide 2026.
Hole protection:
Insert a PVC wall sleeve or rubber grommet into the hole. It protects the hole against dust, insects, and rainwater ingress, and protects the copper tubes against wear and tear.
Pro Tip: Double-check that the drilled hole aligns perfectly with the back of the indoor unit’s piping outlet to avoid pipe bending or pressure loss.
Step 3: Connecting the Pipes and Drain
This step requires precision and patience. You’ll be connecting the refrigerant pipes, drain hose, and electrical cables — the lifelines of your Blue Star AC.
Follow these steps carefully:
Attach refrigerant pipes:
- Connect indoor unit copper refrigerant suction and liquid lines to the outdoor unit circuit path.
- Create smooth, clean flares on pipe ends with a flare tool.
- Torque-hands flare nuts with a torque wrench. Over-tightening produces micro-cracks that lead to future gas leaks.
Connect drain hose:
Hook the drain pipe to the indoor unit outlet. The drain pipe must be installed in a consistent downward slope so that it will be able to provide a free flow of condensate.
- Do not make it turn upwards or pack it in coils.
- Hold the hose in place using a clamp or zip tie so that it will not move.
Hook the electrical cable:
- Connect indoor unit terminals (L, N, S) to outdoor terminals.
- Always check Blue Star’s wiring diagram in the instruction manual for polarity and safety correctness.
Correctly insulate the pipes:
- Tightly cover the copper lines with foam insulation or Armaflex tape to prevent loss of cooling and condensation build-up.
- Then, tie together insulated pipes, drain hose, and power cable in a neat manner using vinyl tape.
- Fit piping in smooth curves and not sharp curves. Sharp curves restrict the flow of refrigerant and result in efficiency loss.
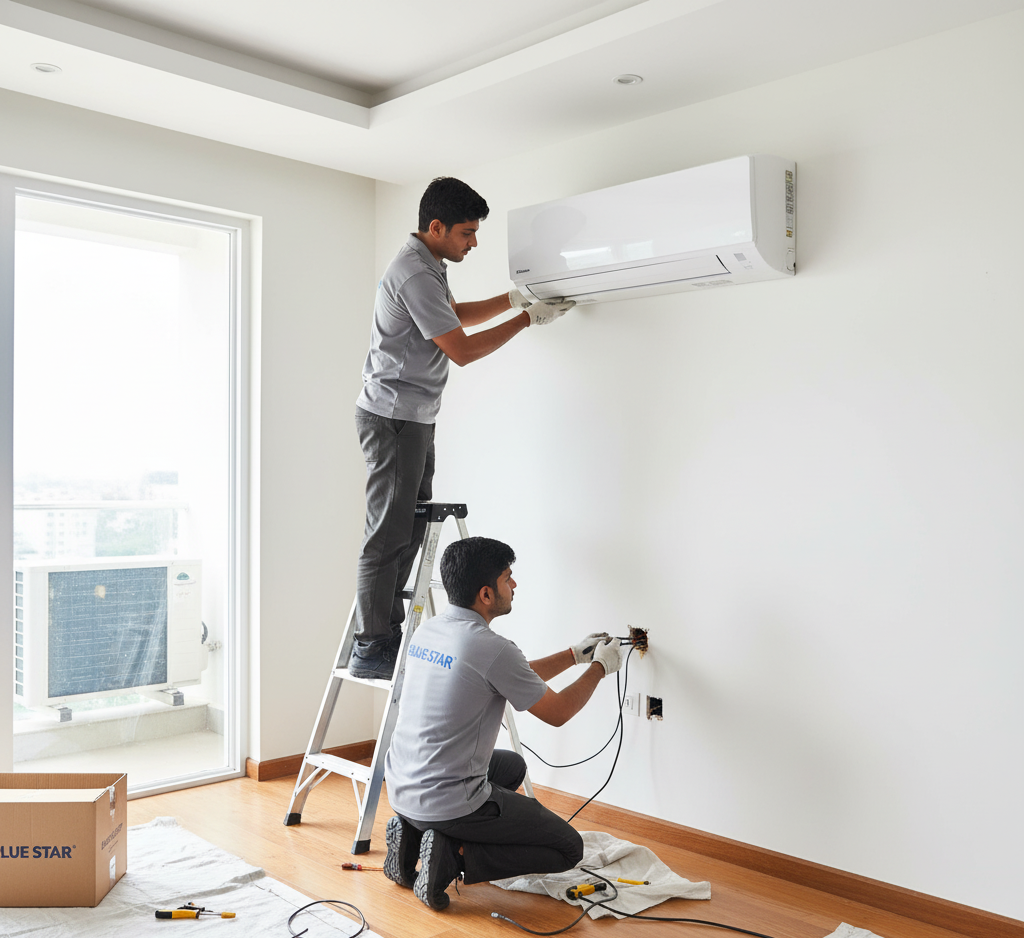
Step 4: Indoor Panel Hanging
Time to hang safely indoor unit — all your preparation will not be for nothing.
This is the way to do it:
Carefully lift and align:
Holding the indoor unit with the assistance of another person, place the back hooks of it into slots within the mounting plate.
Hang and secure it:
Lift unit carefully up until you hear click — that indicates it is seated on mounting plate.
Test stability:
- Rock unit carefully to see if it’s stable and solid. It should not wobble or shake.
- Fill drain pan in unit with small quantity of water to test if it drips freely down through hose. If it drips freely outside, connection and slope are ideal.
Seal the hole in the wall:
After all the lines have been attached, seal the wall hole on either side using foam or silicone caulk to avoid air leaks, moisture, or insects getting inside.
Pro Tip: Employ decorative wall covers or trunking channels to conceal the piping. Besides enhancing the appearance, it keeps the pipes safe from dust and accidental damage.
By the end of these four steps, your Blue Star indoor unit should be perfectly mounted, level, and leak-free, ready for outdoor connections and system testing. Taking time here pays off — you’ll enjoy smoother cooling, quieter operation, and a longer AC lifespan.
3. Connecting the Piping
Preparing the Refrigerant Lines
- Flare the Pipes: Properly flare the ends of the copper pipes to ensure a tight connection, preventing refrigerant leaks.
Connecting to the Indoor Unit
- Tighten Connections: Attach the refrigerant lines to the indoor unit, ensuring all connections are tight and leak-free.
4. Installing the Drain Hose
Ensuring Proper Drainage
- Downward Slope: Connect the drain hose to the indoor unit, ensuring it slopes downward to facilitate effective water drainage.
- Avoid Kinks: Ensure the hose is free from bends or kinks that could obstruct water flow.
5. Mounting the outdoor Unit
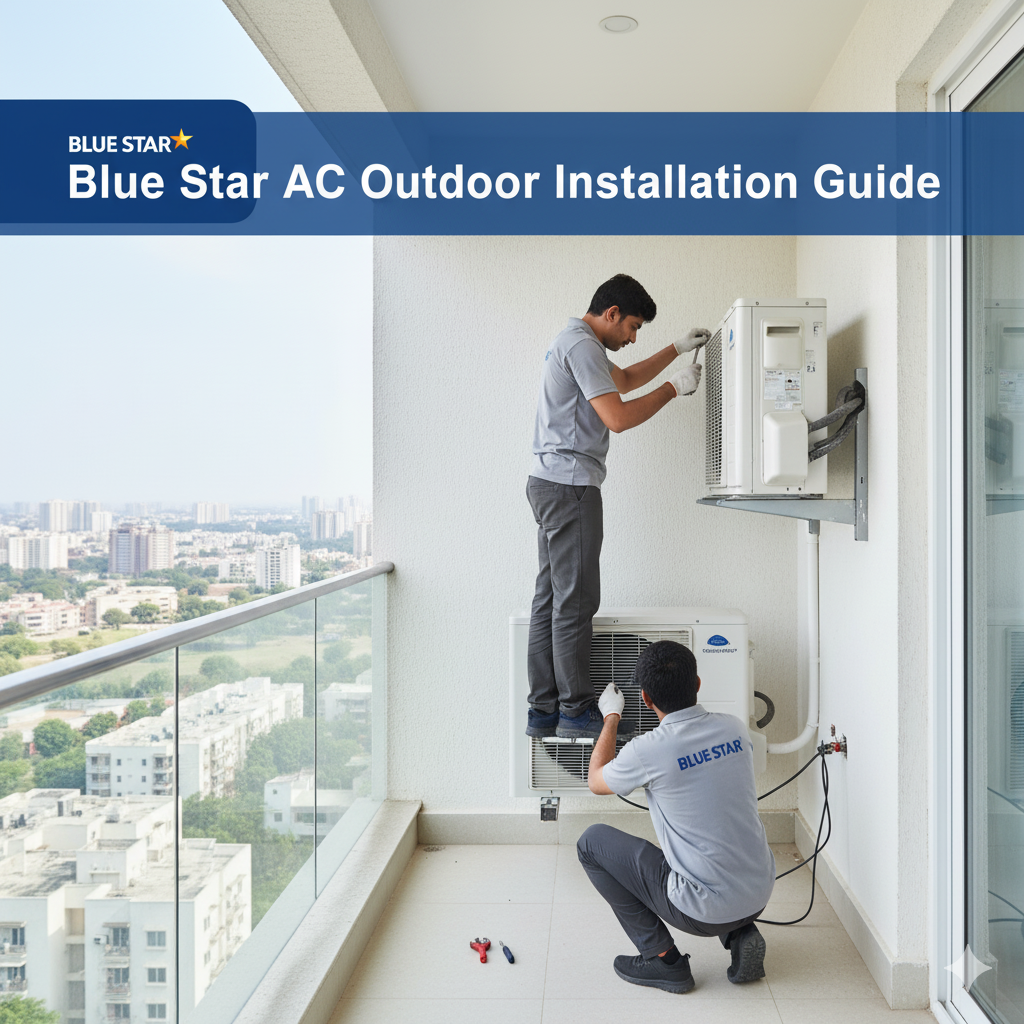
Outdoor Unit Installation Steps
This is a step that needs utmost care and attention as it deals with the movement of heavy equipment and refrigerant lines.
Step 1: Finding the Right Place
Select a place in a way that there is the greatest performance and life. Position the outdoor unit on a hard, firm base like a concrete slab or metal pedestal. Do not install it where the sun will directly shine on it or where there is intense dust or debris. Have at least 12–18 inches of open area around it to facilitate proper airflow and easy maintenance. The region should also allow proper draining of condensed water.
Step 2: Securing and Mounting the Outdoor Unit
Install anti-vibration rubber pads ahead of placing the unit in position to help reduce running noise and vibration. Level the ground perfectly to prevent subjecting the compressor and fan to excessive stress. Bolt the outdoor unit securely to the stand or pad with galvanized anchor bolts. No tilting or wobbling.
Step 3: Connecting the Refrigerant Pipes
Bleed the refrigerant lines from the indoor to the outdoor unit service valves. Insulated copper tubing provides cooling efficiency as well as prevents condensation. Tighten the flared nuts with a torque wrench — enough to create a seal but not so much as to destroy threads. Bleed for leaks with nitrogen or soap solution after hook-up.
Step 4: Electrical Connections
Connect outdoor unit’s power and communications cable to indoor unit as per Blue Star’s wiring diagram. Ensure accurate matching of terminal labels (L, N, S or 1, 2, 3) in order to preserve polarity. Secure all connections, cap them, and keep them dry. Employ conduit pipes for further protection. Lastly, check continuity and ensure voltage prior to energizing.
6. Setting Up the Outdoor Unit
Positioning and Securing
- Stable Surface: Place the outdoor unit on a flat, stable surface, preferably elevated to prevent water accumulation.
- Secure Installation: Anchor the unit securely to prevent movement due to vibrations or strong winds.
7. Connecting Refrigerant Lines to the Outdoor Unit
Ensuring Tight Connections
- Proper Tightening: Connect the refrigerant lines to the outdoor unit, ensuring all connections are tight to prevent leaks.
8. Electrical Connections
Powering the Units
- Follow Manufacturer’s Guidelines: Connect the power cables as per Blue Star’s specifications, ensuring all electrical connections are secure and compliant with local regulations.
9. Air Purging
Vacuuming and Leak Testing
Vacuuming and leak testing are typically rushed or skipped when installing a Blue Star AC — but this is the most important aspect of your air conditioner’s operation in the long run. Skipping this step can lead to inefficient cooling, higher electricity bills, and even permanent compressor damage.
Why Vacuuming Is Important
Vacuuming is not just a technical ritual — it’s eliminating the hidden enemies in your AC’s refrigerant lines: air, water, and dirt particles. These contaminants can drastically reduce the cooling capacity and cause serious mechanical problems in the future.
Here’s what vacuuming actually accomplishes:
- Removes Moisture: A few hundredths of an inch of moisture will freeze up inside the refrigerant lines, restrict gas flow, and ruin the compressor.
- Eliminates Air Bubbles: Trapped air in the copper tubing reduces refrigerant pressure, making your AC work less efficiently.
- Prevents Rusting: Water can mix with refrigerant oil to form acids that rust the internal components.
How to do it right:
- Connect the manifold gauge to the outdoor unit service port.
- Connect a vacuum pump to the center hose of the manifold gauge set.
- Switch on the vacuum pump and run it for 15–30 minutes until the gauge is -30 inHg (inches of mercury).
- Once your desired vacuum level is obtained, close off the valve and observe the gauge for around 10 minutes.
- If the pressure rises, it means there is a leak or leftover moisture still present inside.
- If the pressure stays steady, your system is sealed to perfection.
- This simple but critical process ensures your AC system is completely clean and ready for refrigerant flow.
10. Final Checks and Testing
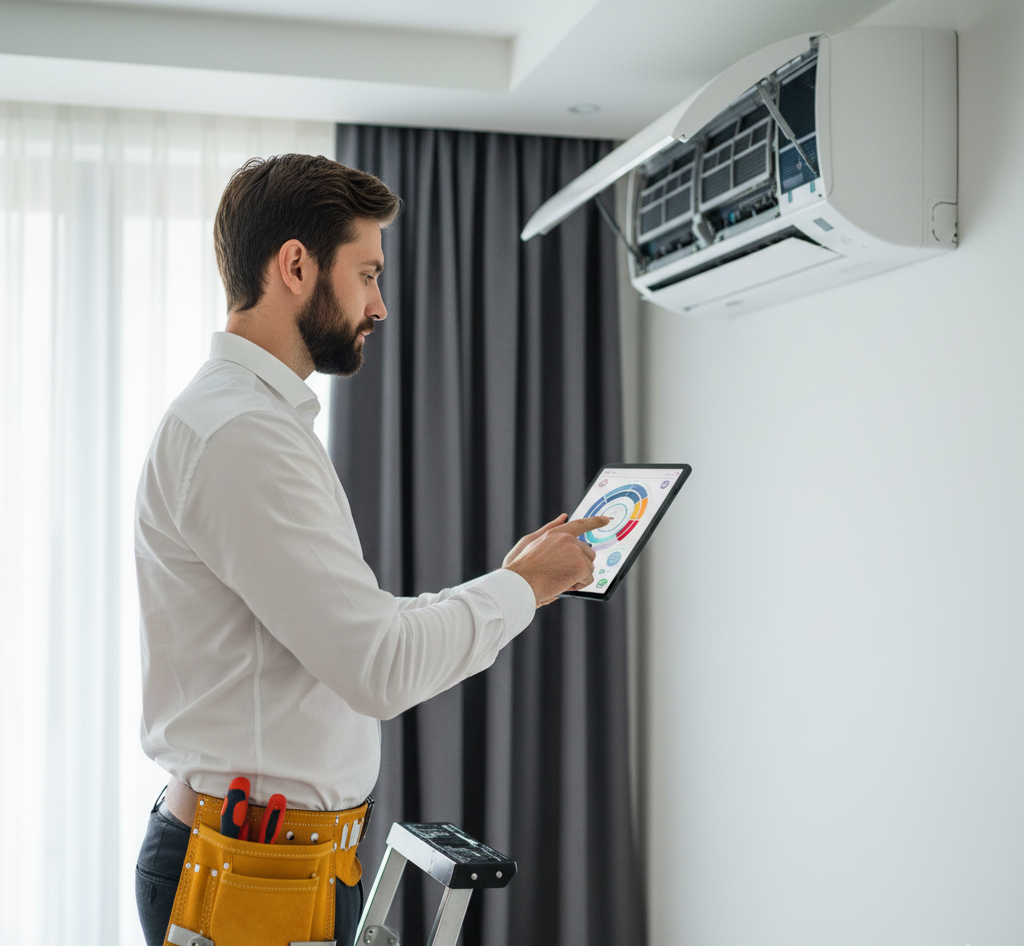
Ensuring Optimal Operation
- Inspect for Leaks: Check all connections for potential refrigerant leaks.
- Test Run: Power on the AC and run it through various settings to ensure everything functions correctly.
FAQs (Blue Star AC Installation Guide)
1: Can I install my Blue Star AC myself?
While understanding the installation process is beneficial, it’s recommended to have a certified technician install your AC for safety and performance reasons.
2: How often should I service my Blue Star AC?
Regular maintenance is crucial. It’s advisable to have your AC serviced at least once a year to maintain efficiency and extend its lifespan.
3: What should I do if my AC isn’t cooling properly after installation?
Ensure that all installation steps outlined in this Blue Star AC Installation Guide were followed correctly. Check for refrigerant leaks or obstructions in airflow. If issues persist, contact Blue Star customer support or a professional technician.
4: Are there specific electrical requirements for installing a Blue Star AC?
Yes, ensure that your home’s electrical system meets the voltage and amperage requirements specified in the Blue Star AC manual to prevent electrical hazards.
5: Where can I find the official Blue Star AC installation manual?
You can access the official installation manual on Blue Star’s website or through authorized dealers.